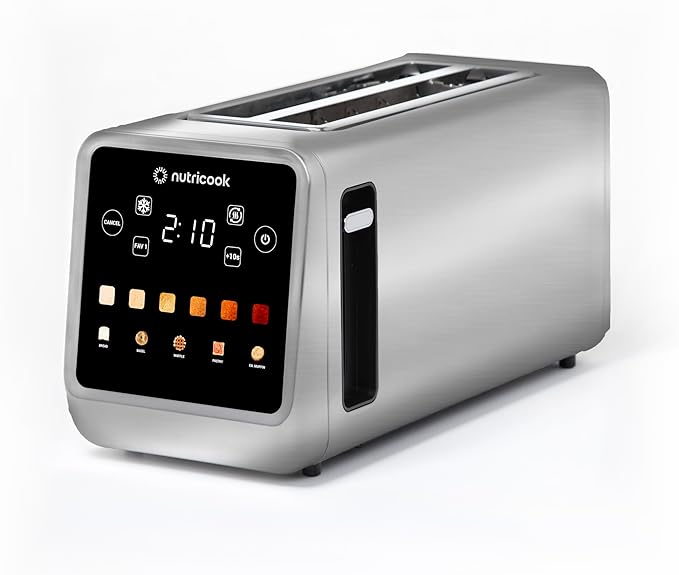
Nutricook Toasti Digital Toaster
Digital toaster with smart controls, multiple bread modes, and 6 adjustable shade levels.
⚠️ Important Safety Notes
- Never leave the toaster unattended while in use.
- Do not use the toaster without the crumb tray properly inserted.
- Always clean the crumb tray after each use.
- The toaster and metal parts become hot during and after use.
- Do not touch the sides or metal parts without allowing them to cool.
- The Toast Lever will not lock down if the toaster is unplugged.
- Never force bread or food into the slots.
🔥 How to Toast Bread
Insert the Bread
Insert the bread into the toast slots. Bread should fit easily without forcing.
Select the Bread Type
Choose the relevant bread mode using the function buttons.
Select Your Preferred Toast Shade (1–6)
Tap one of the 6 shade squares below the display.
- 1–2 = Light
- 3–4 = Medium
- 5–6 = Dark
Push Down the Toast Lever
Push it until it locks in place to begin toasting. The display will show the pre-programmed time, and the countdown begins automatically.
Toast Complete
When done, the toast will pop up automatically. Turn off and unplug the toaster after use.
NOTE: If you push the Toast Lever down without selecting anything, it will default to Bread – Shade 1.
❄️ Defrosting (Frozen Bread / Waffles)
Use this to defrost and then toast frozen items.
Insert Frozen Bread
Insert frozen bread into the slots.
Press DEFROST Button
Press the DEFROST button, then select your bread type and shade level (1–6).
Start Defrosting
Push down the Toast Lever until it locks. The toaster will adjust the timing for frozen items and begin the countdown.
Complete
When finished, the food will pop up. Turn off and unplug after use.
🔄 Reheating (Bread, Bagels, Waffles)
Reheat items without browning them further.
Insert Items
Insert the bread or item into the slots. For bread rolls or croissants, use the warming rack (see below).
Press REHEAT Button
Press the REHEAT button.
Start Reheating
Push down the Toast Lever until it locks. The timer will appear and start automatically.
Complete
Food will pop up when finished. Turn off and unplug after use.
🥐 Using the Removable Warming Rack
Use the warming rack for bread rolls, buns, and croissants that are too large for the toast slots.
Place Warming Rack
Place the warming rack on top of the toaster. Place the food on top of the rack.
Press REHEAT
Press REHEAT, then push down the Toast Lever until it locks.
Wait for Completion
The countdown begins automatically. Turn off and unplug after use.
⚠️ Warning
Do not touch the warming rack immediately after toasting. It will be hot.
🛑 Canceling Toasting
Press the CANCEL button at any time to stop the cycle instantly.
⭐ Tips for Best Results
- Use the shade icons to choose exact browning levels.
- For small bread slices, lift the lever slightly at the end to raise the toast higher.
- For frozen bread, always use DEFROST instead of Toast mode.
- Clean the crumb tray often for safety and even toasting.
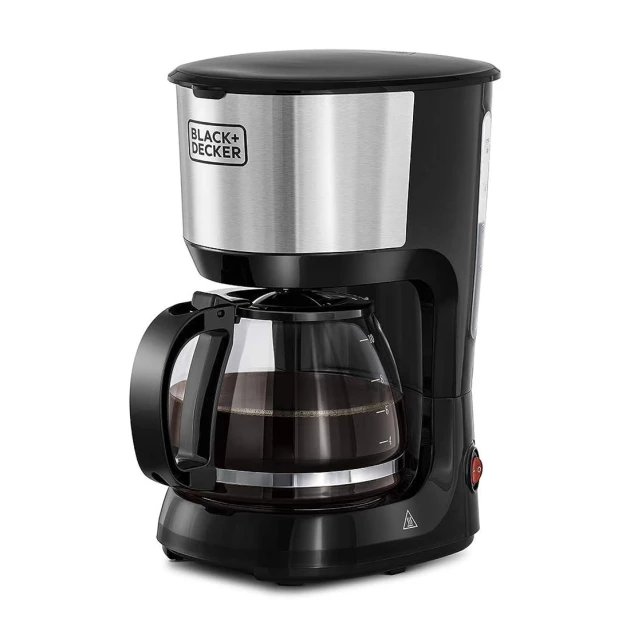
BLACK+DECKER Coffee Maker
This machine makes classic filter (drip) coffee using ground coffee and water.
⚠️ Quick Safety Notes
- Hot surfaces and steam during use — do not touch the top cover or hot plate.
- Do not use if the glass carafe is cracked.
- Always keep the carafe on the hot plate during brewing.
- Never fill water above the MAX mark.
- Turn OFF and unplug after use.
✅ How to Make Coffee (5 Easy Steps)
Add Water
Open the top cover. Pour fresh water into the water tank (do not exceed MAX).
Add Coffee
Place the filter in the funnel. Add 1 level spoon of ground coffee per cup (adjust to taste). Close the top cover properly.
Place the Carafe
Put the glass carafe flat on the warming (hot) plate.
Start Brewing
Plug in the machine. Press the POWER switch to "I" (ON). Brewing starts automatically.
💡 You may briefly remove the carafe to pour a cup, but no longer than 30 seconds.
Finish & Serve
Coffee drips stop when brewing is complete. Serve immediately for best taste. Leave ON to keep coffee warm only if the carafe has coffee in it.
⏹ To Stop Brewing
Press the POWER switch to "O" (OFF) at any time.
🧼 After Use & Cleaning
- Switch OFF and unplug.
- Let the machine cool.
- Wash filter, funnel, and carafe with warm soapy water.
- Wipe the hot plate with a damp cloth (no abrasives).
- Never immerse the machine in water.
🧂 Descaling (Occasional)
If water is hard, descale periodically:
- Use a household descaler (or citric acid solution).
- Run the machine without coffee.
- Rinse by brewing clean water at least 3 times afterward.
⭐ Tips for Great Coffee
- Use fresh, cold water.
- Use fresh ground coffee; do not reuse grounds.
- Best flavor is right after brewing.
🔌 When You're Done
Always turn OFF and unplug the machine.
Nutricook Smart Pot
This Smart Pot is a multi-function electric cooker. It can pressure cook, slow cook, sauté, steam, reheat, and make yogurt safely when used correctly.

⚠️ Important Safety Rules (Please Read First)
- Do NOT open the lid while cooking under pressure
- Only open the lid after pressure is fully released
- Never fill above the MAX lines inside the pot
- Pressure cooking max: 2/3
- Rice / beans: 1/2
- Always add liquid (minimum: 375 ml for 6L / 500 ml for 8L)
- Use only the inner pot — never pour food or liquid into the base
- The pot and steam are very hot – keep face and hands away
- For pressure cooking, the pressure release button must be UP (Sealing)
🔘 Basic Parts You'll Use
Inner Pot – where food goes
Lid – locks during pressure cooking
Pressure Release Button
- UP = Sealing (Pressure mode)
- DOWN = Venting (No pressure)
Float Valve
- Up = pressurized (do not open)
- Down = safe to open
✅ Basic Cooking (Pressure Cooking – Most Common Use)
Prepare Food
Open lid. Put food + liquid into inner pot. Check fill level (do not exceed limits).
Close & Seal
Place lid on and turn clockwise to lock. Ensure Pressure Release Button is UP (Sealing).
Select Program
Plug in. Choose a program (Rice, Soup, Meat, Beans, Pressure Cook, etc.). Adjust time if needed. Press START.
⏳ Display shows "On" while building pressure, then counts down.
🔓 After Cooking – Releasing Pressure
DO NOT FORCE OPEN THE LID
Option A: Natural Release (Recommended)
- Wait 10–15 minutes
- Float valve drops down
- Safe to open
Option B: Quick Release (For veggies/steam)
- Carefully press Pressure Release Button DOWN
- Keep face & hands away from steam
- Wait until float valve drops
🥘 Sauté (Frying / Browning)
✅ Used WITHOUT pressure
- Keep lid OFF
- Insert inner pot
- Press SAUTÉ
- Select Low / Med / High
- Press START
⚠️ Never close the lid during sauté mode
🍚 Useful Programs (Quick Info)
- Rice – best with natural pressure release
- Soup / Beans / Meat – always use natural release
- Steam – use steam rack + quick release
- Slow Cook – pressure release button DOWN (Venting)
- Keep Warm – turns on automatically unless switched off
🧼 After Use
Power Off
Press CANCEL. Unplug. Let cool.
Clean
Wash inner pot with soap & water. Wipe cooker base with a dry or damp cloth. Empty condensation collector.
🚫 Do Not
- Do not open lid while float valve is up
- Do not deep fry with oil
- Do not touch steam outlets
- Do not move cooker while hot or pressurized
✅ Quick Tip for Guests
If unsure:
- Use Rice, Soup, or Pressure Cook
- Leave everything at default
- Let pressure release naturally